Last Updated on June 11, 2020
Transform Your Vintage Silver Spoons with this Spoon Hook Craft using Stamped Personalization
Do you like to hang onto some of Grandma’s old things, just to give you a sense of being close? I sure do. When my Grandmother passed, I received a full set of beautiful china and two felt-lined boxes of her silverware.
To me, those items embodied my grandmother who spent her life cooking for her family and teaching us all how to nourish each other with good food and good company like playing cards as a family. These days, my entertaining is more informal, even paper plates. GASP! Consequently, I think I’ve only used her china and silver a couple of times in the last three decades since she passed.
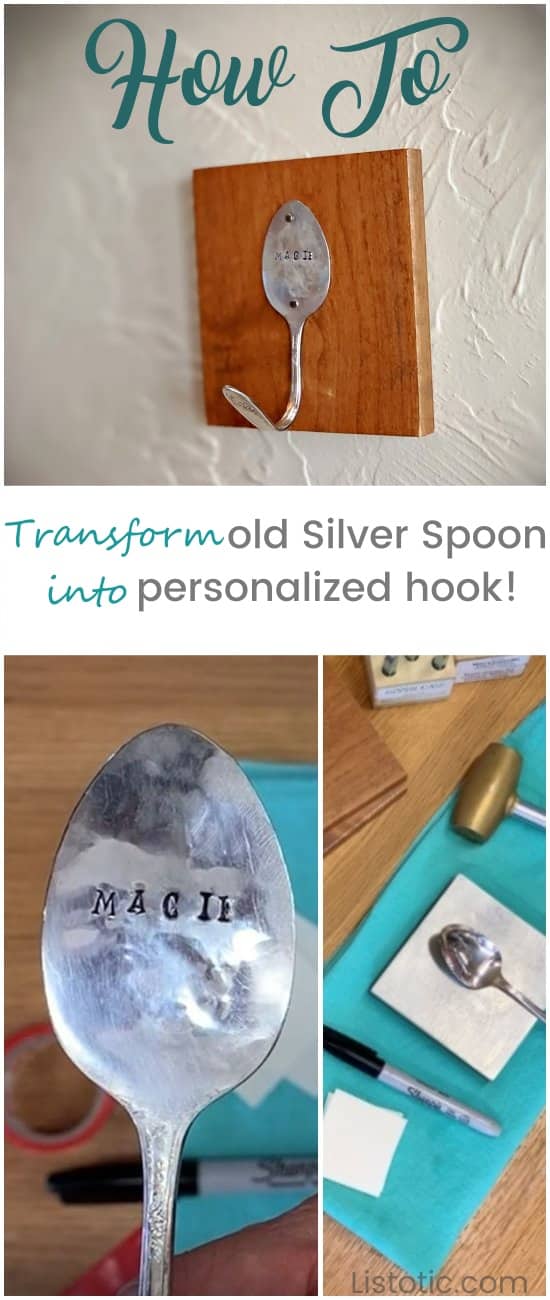
That is…until I discovered a better way to use my vintage silver spoons! Using this silver spoon craft tutorial, I transformed my Grandma's heirloom silver spoons into a personalized (stamped) hook so that I can give to my granddaughter to hang her backpack, jammies, or whatever she wants to hang on it. Therefore, I can’t think of a better way to pass on her great-great grandmother’s silver spoon.
Try this Silver Spoon Craft Today!
Watch a quick video for this silver spoon craft below showing the steps that I’ve taken to transform my Grandma’s vintage silver spoon into a personalized hook. This spoon craft is easy and only takes few tools.
Tools Needed:
Steel Pounding Bench Block
Towel
Metal Pounding Mallet
Vintage Silver Spoons – must contain silver to make stamping work.
Electrical Tape
Black Permanent Sharpie
Polishing Pads
Set of Metal Stamping Letters – size 3.2mm to 6mm
5 lb weight or some other sturdy product to wrap the spoon – approx. 1.5 inches in diameter
Piece of wood to attach the hook
Preparation of the spoon craft:
- Determine the personalization. In my case, I used the name “Macie”. Keep in mind the size of your stamp set, as well as the size of the spoon. The set I used is 3.2mm and called Kismet that I purchased from BeadEducation. The exact stamping letters can be found at BeadEducation.
- Layout the stamps next to your stamping block in the order you will use them. TIP: If you use the same stamp in multiple locations, leave an empty space to remind you.
- Start by laying your spoon face down on your pounding block TIP: You will need to hang it off the edge of the block to get the spoon as flat on the pounding block as possible before you start.
Preparing to Stamp the Spoon:
- Pound out the spoon using the metal hammer. Tip: Make sure you are pounding on the back side of the spoon. Otherwise, you may damage the spoon surface where you want to stamp.
- Turn the spoon over. Secure it to the pounding block with electrical tape. TIP: Placement of the tape is important. You will be stamping on the top edge of the tape, so place it straight across and at a location where you want the stamped words to appear.
Stamping the Spoon:
- First, begin with the middle letter. In my case, “Macie”, I would start with the “c”. Locate the middle of the spoon and line the stamp up with the top of the electrical tape. TIP: Slide the stamp around a little and get the feel of the stamp hitting the electrical tape. You’ll want the bottom of each letter to line up the same on the tape. This is where the art of metal stamping comes into play. If this is your first stamping experience, then I recommend you get some cheap copper samples and play around. Use at least 12 gauge for your testing samples. That way you will have thicker samples emulating the thickness of the spoon.
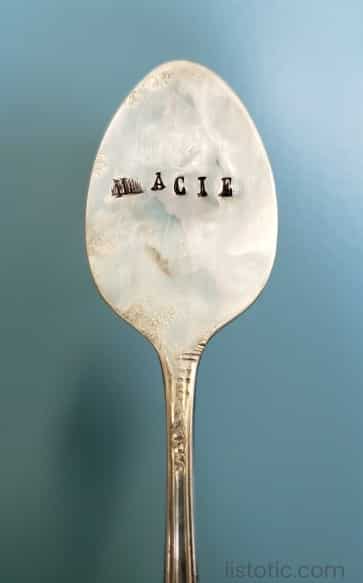
- Hold the stamp steady and give it several strong whacks. You will find some people will only do one whack, and for good reason, because if the stamp moves between whacks, you will get a jumbled letter – like below. Yes, I did trash this spoon and started over.
But, if you don’t hit hard enough, you won’t get a good solid stamp. You can see my “E” on the final product was lacking a little power.
The thicker your spoon, then the more you’ll need to whack. Keep in mind, you may ruin a few in your attempts to get a final product, but not to worry. Practice makes perfect! Also, remember, imperfections make this truly from the heart. 😊
- Next, stamp the letters to the right (in order). For me, I would do the “I”, then the “e”.
- Then, stamp the letters to the left (in opposite order). For me, I would do the “a”, then the “M”, so the spacing stays even.
Darken the Stamp Indention:
- Once the stamping is complete, take the black Sharpie and color in over the letters to create a contrast. Then, use the cleaning clothes to remove any extra marker stains. The marker will still appear deep in the grooves of the stamp.
Form the Silver Spoon Hook
- Because you want the hook to show your stamping, you want to place the spoon face down (i.e. stamping down) and wrap it around the handle of the weight. This will take a bit of force, so put some muscle into it! TIP: Once you get the bend going, you can do some final touches by hand.
Mount the Hook
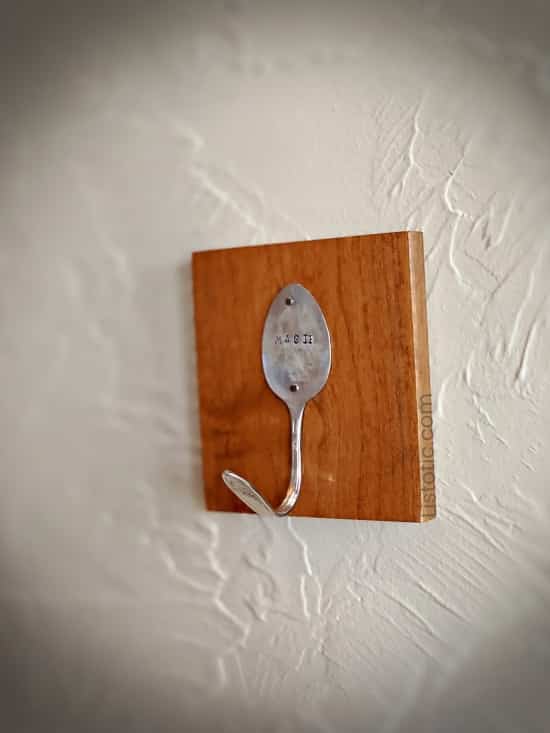
- Finally, you need to attach the hook to your mount. You can also mount it directly to the wall. Or, make 5 personalized spoons and put them on a long board then attach the board to the wall. But, I’ll leave the creative display piece up to you.
- In any case, I wanted to demonstrate that you can use nails or use a drill to drill a small hole in the spoon to attach it.
There you go! When all is said and done, it’s quite a nostalgic feeling to pass down a usable heirloom to the next generation. So, I’m hoping that my granddaughter will cherish this silver spoon from her great-great-grandmother and maybe even take it with her to college and beyond.
Besides, it provides me with an awesome opportunity to share special memories of my grandmother. For example, the beauty of a Christmas dinner with all of the china set on the table and everyone holding hands and the meal our entire family shared using the spoon she now possesses — all part of living a wholesome, happy life and sharing it with others!




 Please refer to our