Last Updated on November 5, 2021
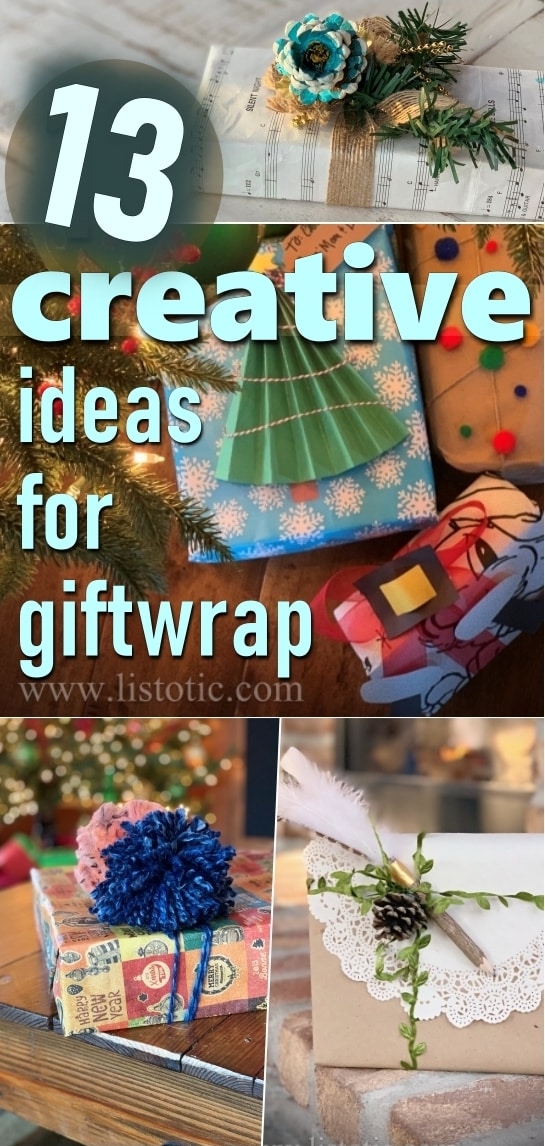
You have come to the right place to find creative ways to wrap a gift!
One thing is certain for all of us at Listotic, wrapping presents seems like a rushed experience with a lack of creativity. There is so much work that goes into finding the perfect gift for someone. So, when it comes to wrapping, we just want to get it done!
In true Christmas spirit, we spent a day this week looking for inspiration and wrapping a few presents we have for Christmas coming up. Meanwhile, Christmas music was playing in the background.
With these ideas at hand, the actual work of wrapping turned into a whole lot of fun! We included the inspiration behind our choices for wrapping and included any tips or tricks we learned along the way as we wrapped our own gifts. Consequently, if you try some and have ideas to improve, send them our way!
This post may contain affiliate links. Please see our Disclaimer Policy.
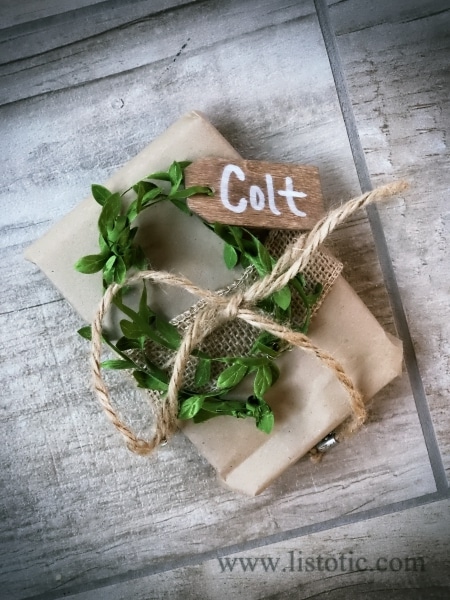
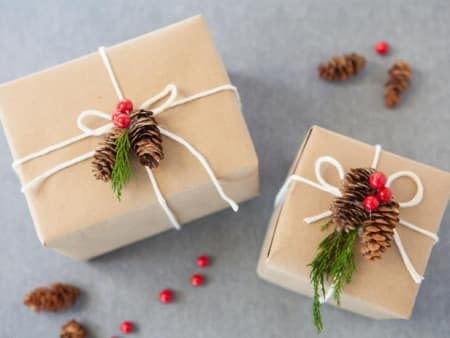
1. Create a rustic gift topper with wood, burlap, twine and greenery.
Katie's Inspiration
I found inspriation in the Kraft paper, burlap and greenery viewed on Craft Berry Bush and the wooden gift tags found at A Pretty Happy Home.
Katie's Wrapping Project
Materials Needed:
White or Silver Sharpie Marker
Silver Beads (optional)
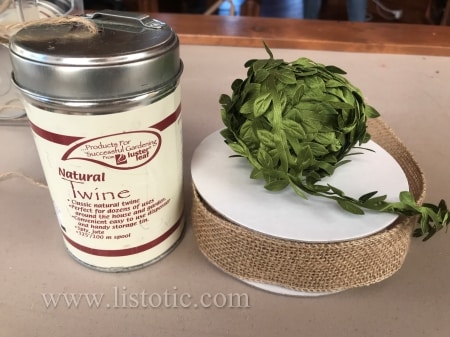
Starting with Kraft paper, adding a bit of burlap and twine to add a bow. These silver beads were left over from my wedding…a few years ago. They have a cross on them, so it seemed festive for Christmas too.
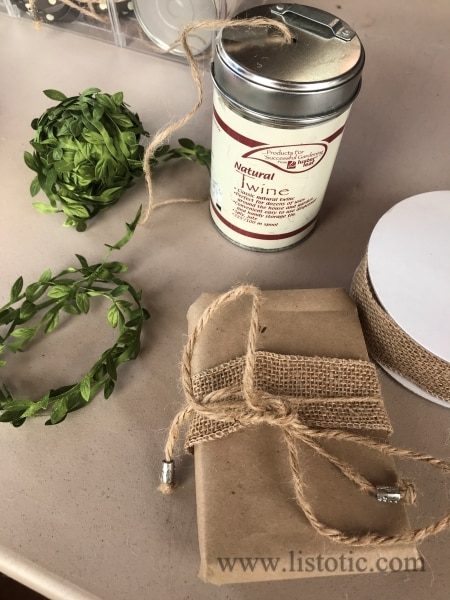
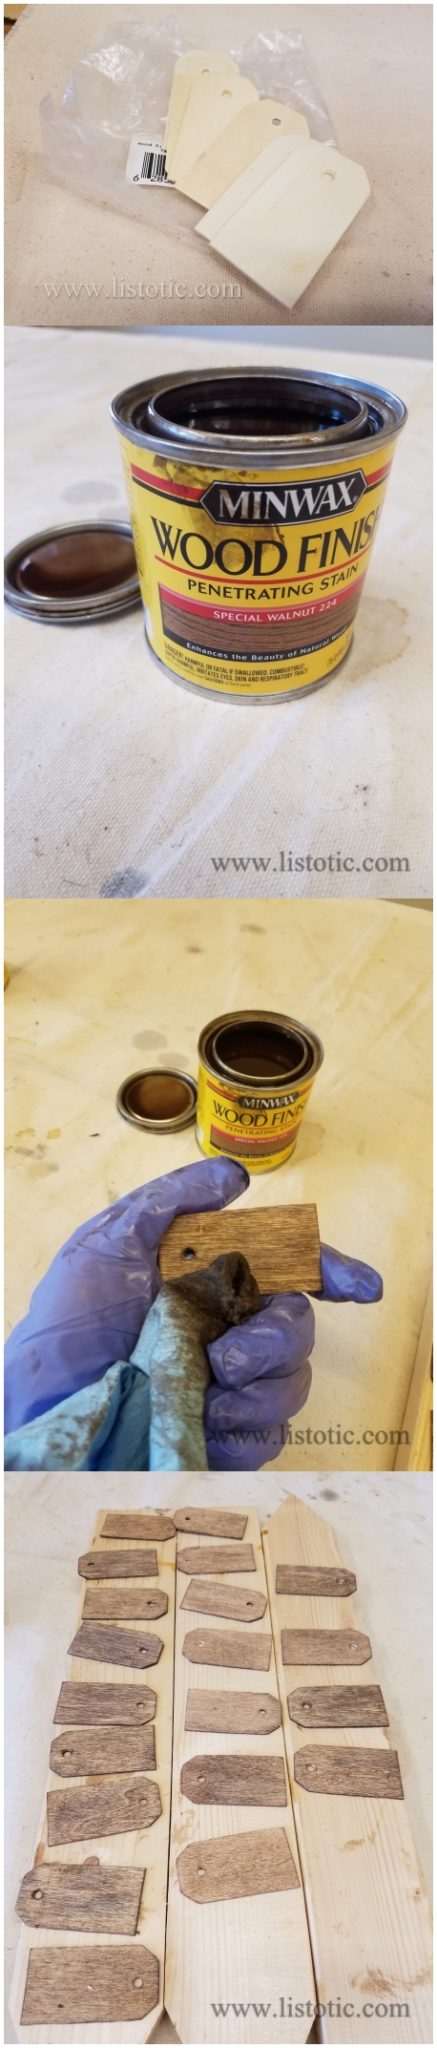
Stained gift tags add such a cute touch with the simplicity of the brown packaging and green wreath. See in the pictures below, how simple it is to stain a wooden gift tag. You just need stain, I used Minwax Special Walnut, rubber gloves and a rag.
TIP: Make sure you wear rubber gloves and work in a well ventilated area. AND, make sure you lay out your rag to dry before discarding it. If you wad it up and throw it away, you run the risk of starting a fire. Stain is a combustible product. It really isn't as scary as I am making it sound, just get in the habit of drying your rags.
Katie's Final Package
Isn't this the fanciest wrapping paper you've ever seen for a pack of Uno cards? 🙂
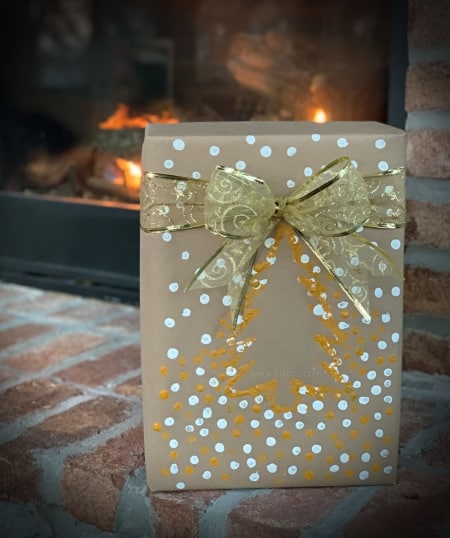
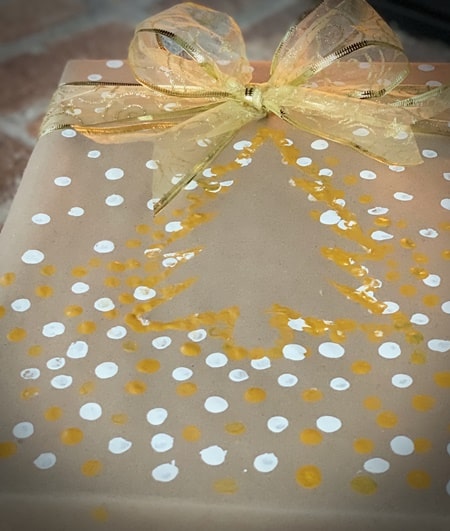
2. Christmas Tree Wrapping
Katie's Inspiration
My inspiration came from A Dab Of Glue Will Do. I used the idea of decorating around a Christmas tree to create the perception of a 3-D tree.
Katie's Wrapping Project
Materials Needed:
Kraft Paper
Card Stock (1 sheet)
Paint (white and gold)
Pencil


Steps to create this package:
1. Print your favorite Christmas tree image on the card stock.
2. Cut out the image.
3. Wrap the present in kraft paper
4. Place the tree on the present. You will use this template to paint around the outside of the tree.
5. Dab paint on the eraser end of your pencil and apply it to your package (outside the tree)
6. Remove the tree, and let dry.
7. Tie it all together with a fancy bow.
Here is a great video to help you tie the perfect bow for your package.
Katie's Final Package
This happens to be a box of classic Legos. If you are a boy Mom, Legos are always a hit!
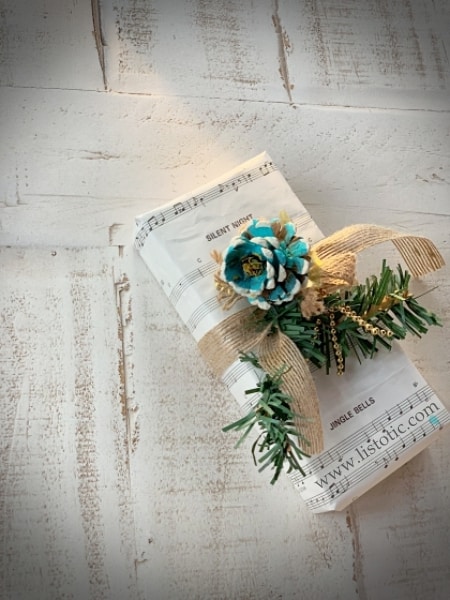
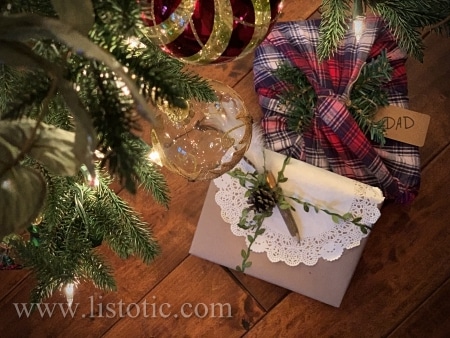
3. Elegant Christmas wrapping with sheets of music.
Andrea's Inspiration
My inspiration came from one of the many inspiring images at MissMustardSeed.com
Andrea's Wrapping Project
Materials Needed:
Sheet Music
Pine cone
Paint
Greenery
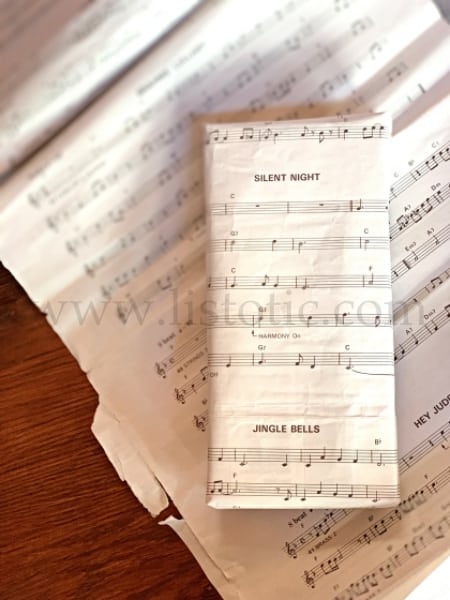
My kids broke my 90’s Yamaha Portable keyboard (raise your hand if you had one of these!) Gone are the days of pretending to jam-out to “HEY JUDE” and “YESTERDAY” jingles. I was left with the sheet music that came with it. Like any crafter (or mild hoarder) would do…I kept it; just certain it would come in handy someday. Since I never actually learned to play the keyboard or cultivate any sort of music talent whatsoever….why not cut it up and use it for creative wrapping paper! (Of course after a firm lecture to my kids about being more respectful to their toys.)
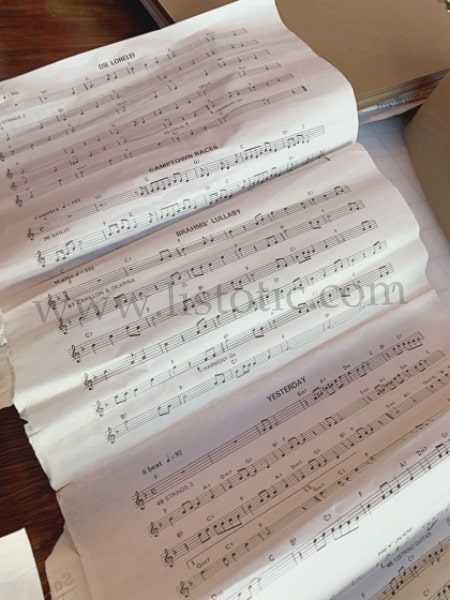
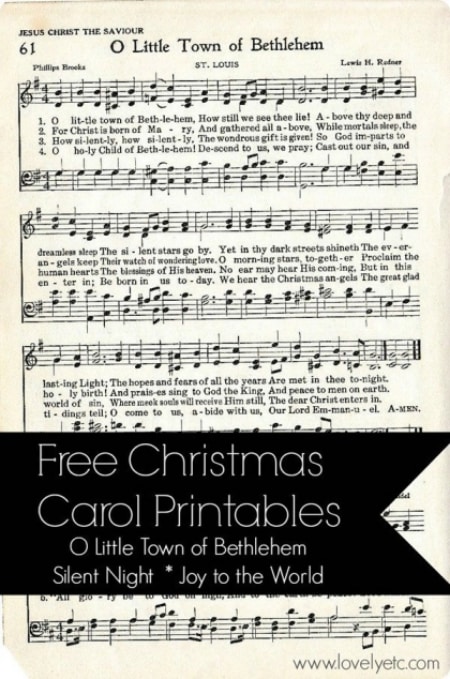
If you don't have retro 1990 portable keyboard music sheets like me, Carrie at Lovely Etc… can hook you up with free Christmas carol printables. Or, head to your local Salvation Army, thrift shop, garage sale, or Goodwill store. Wrapping a Christmas gift in sheet music gives your gift elegance (even if you wrapped up a pair of socks) and can even be personalized by the type of music you decide to use. Sweet Caroline – for instance!
I wanted the topper on this gift to be bright yet natural. I was inspired by the pinecone transformations in this post by: A Fanciful Twist.
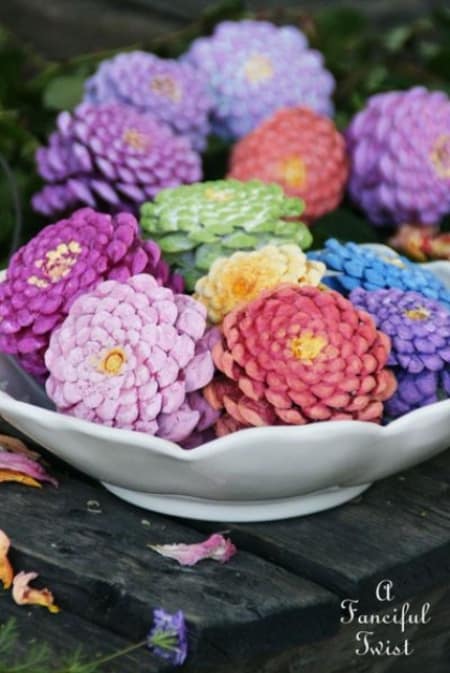
Mine didn’t look nearly as beautiful but it had the pop of color I was wanting for the topper on this gift that was otherwise black and white.
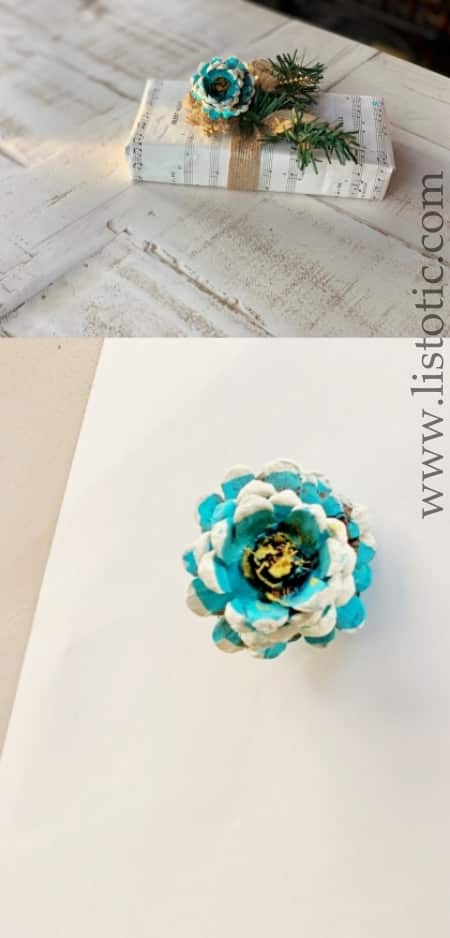
Andrea's Final Package
4. Kid's coloring book with Santa boots bow.
Andrea's Inspiration
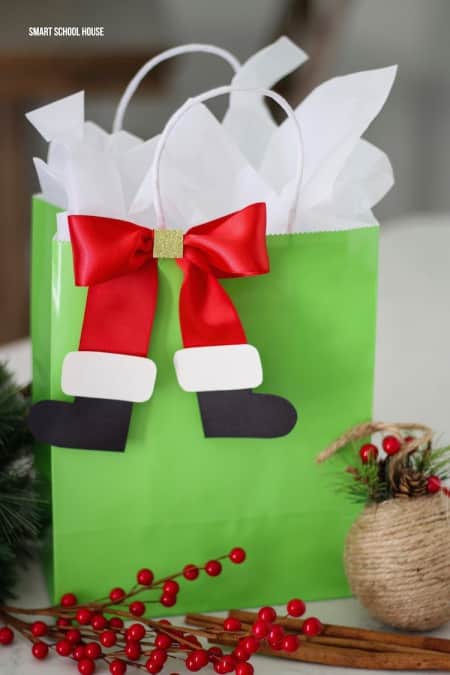
I would recognize those legs anywhere! Only at Christmas time can crafting the resemblance of an old mans lower body half be fun gift topper – sorry but it’s true!
This bow could go on a gift bag, ornament, wreath, card and so much more! There are 3 things love about what Kelly did to create this Santa’s boot bow…
-
- It only took a plain ordinary green gift bag you can find at the dollar store and made it a unique Christmas gift bag that is sure to get someone to Oooh and Ahhh at the Christmas party. You could also make you own gift bag! Watch here:
- I love it because it is so easy! Everyone knows what Santa’s legs look like…just a little black, white and gold paper added to a red bow and it you can immediately recognize who it is.
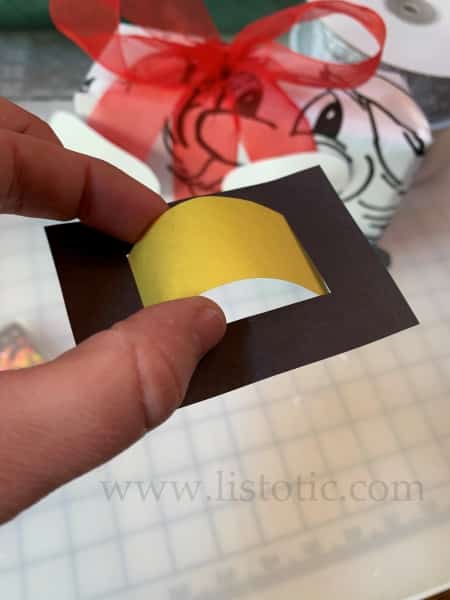
- I’m in awe on how they covered the knot! I was simply blown away by this genius idea – covering a not-so-perfect bow knot with a small square of glittery paper…Brilliant for non-skilled-bow-makers like me! Check out how Kelly did it at her website SmartSchoolHouse.com
Andrea's Wrapping Project
Materials Needed:
Construction paper
Large coloring book pages (or Kraft paper, or other wrapping paper)
Ribbon
This year I found a giant coloring book to keep my boys busy during a family vacation trip. They loved that the pages were so huge the entire family could color at the same time. Here is the coloring book I purchased.
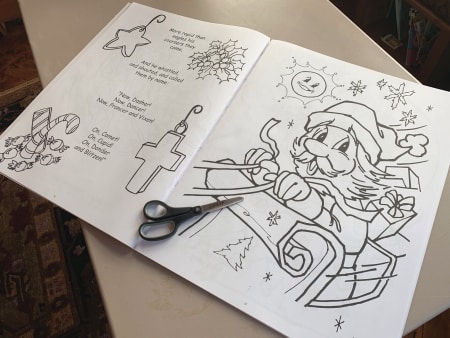
While coloring with the boys, I had the idea to use it as gift wrap! On this particular gift, I used a blank page so that the recipient could color the page themselves (it’s the gift wrap that keeps on giving!). But, if this was for a grandparent or teacher, it could be personalized by having the child giving the gift color the page first before wrapping. Be careful! If you’re not keeping it, don’t let the kids see you throw it away with the other used wrapping paper – they might be heartbroken!
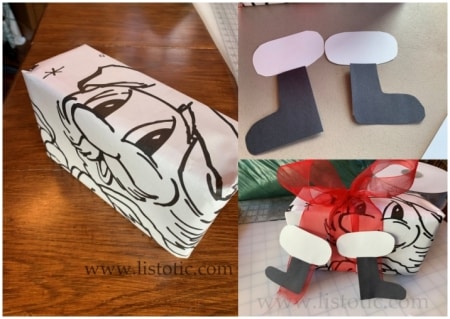
Making the Santa boot bow was so easy. To start, I just took some red ribbon and tied it around the gift. Follow the instructions here for cutting the boots.
I couldn’t find my gold glitter scrapbook paper (I just know it’s buried somewhere in my office closet!) But, I was able to make a belt imitation using a square frame of black construction paper with a yellow rectangle threaded through the loop.
I was doing this without the “help” of kids, so hot glue was my adhesive choice. I’m sure a fabric glue or Elmer’s would work too… probably depends on your ribbon material.
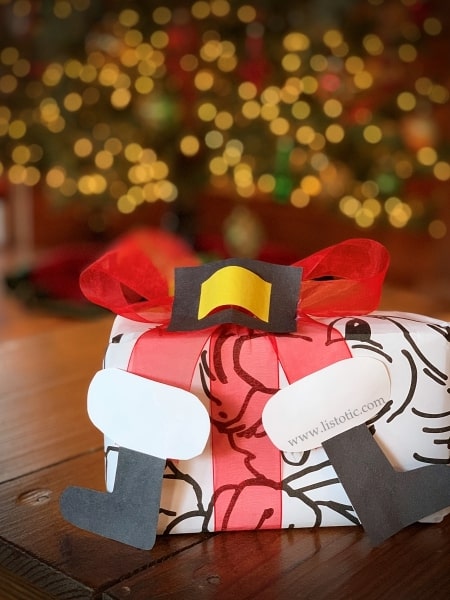
Andrea's Final Package
HO HO HO! Just check out those legs! Kids or adults would be delighted to receive a gift using a giant coloring book page with a Santa boot bow.
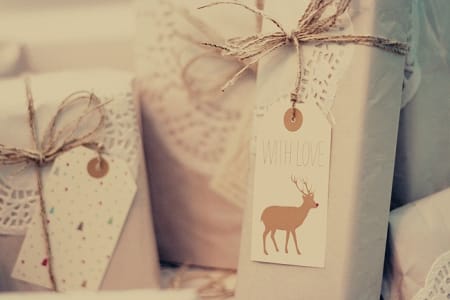
5. Doilies, Pinecones & Feathers — OH MY!
Andrea's Inspiration
Pull out that craft box, because here is your chance to make something spectacular out of your past project leftovers. Just look at how these professionals used simple pieces to create elegant gift wrap.
Andrea's Wrapping Project
Materials Needed:
2-3 Feathers
Pine cone
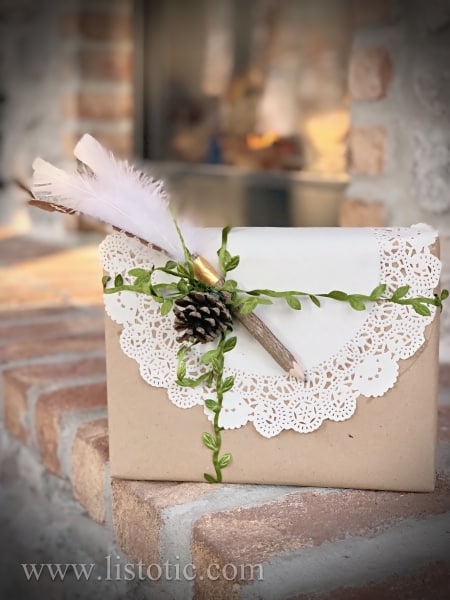
Just let your combination of ideas run wild! I decided to use an 8 inch doily to wrap one side of the gift half way around the top and bottom of the gift. I used hot glue to attach the doily, but two-sided tape would have done the job just fine. The green garland ribbon came in a large quantity and was super easy to use.
In place of a bow I added a pine cone and a party favor (twig pencil with fake feathers taped with gold washi tape) leftover from my son’s 6th birthday party.
The combination of ideas and materials; makes this gift a beautiful addition under the Christmas Tree.
Andrea's Finished Package
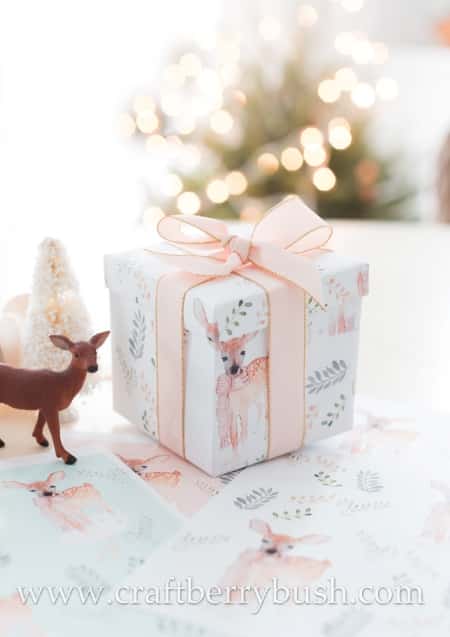
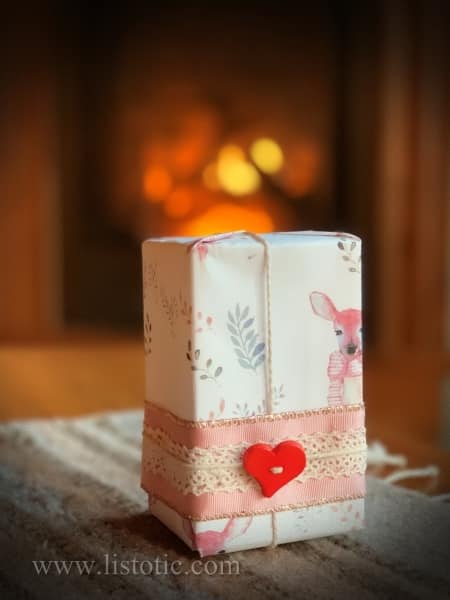
6. Printable Gift Wrap
Andrea's Inspiration
I’ve always wanted to try a printable gift wrap. I found this printable wrapping paper at www.craftberrybush.com
Andrea's Wrapping Project
Materials Needed:
Printer paper and Printer
Ribbon
Button
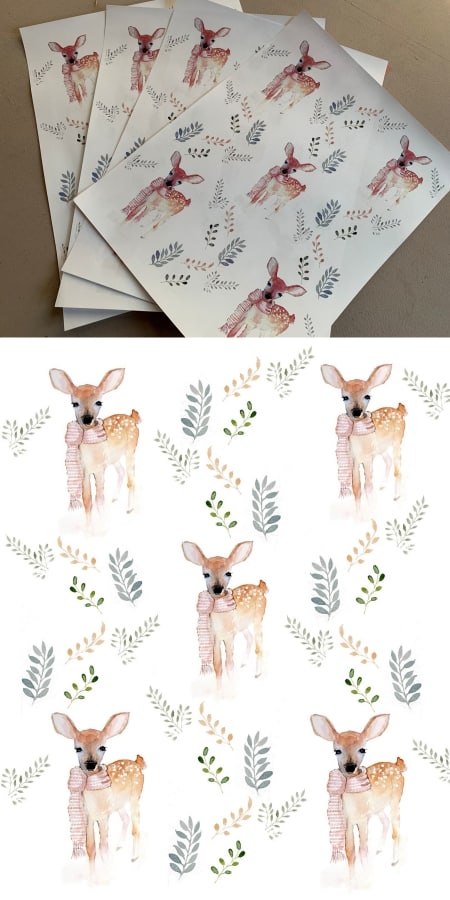
I just love the design and colors of this printable. It printed great on a regular 8.5″ x 11″ office printer and copy paper. I printed extra pages, so I could tape it together if needed. While I didn’t really like the idea of taping the pieces together, it was necessary even though the gift I was wrapping was small. So,in order to put the pages together easily, I used double-sided tape.
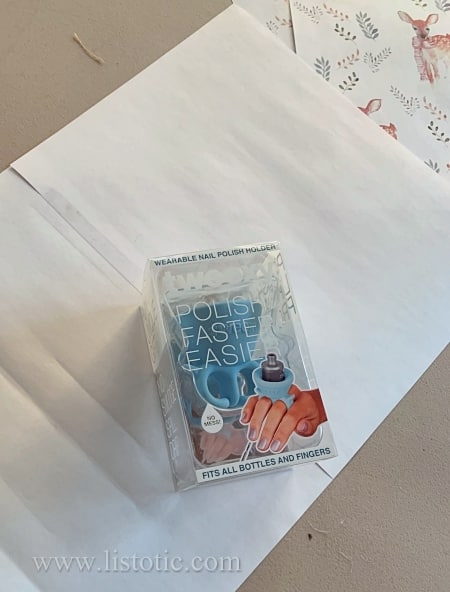
If you are wondering, this wearable nail polish holder is for my niece, I haven’t tried it myself but I found it listed on this article 42 Strangest But Most Practical Hidden Gems On Amazon. Seems like a more efficient to get your nail polish brush back and forth while your painting your nails.

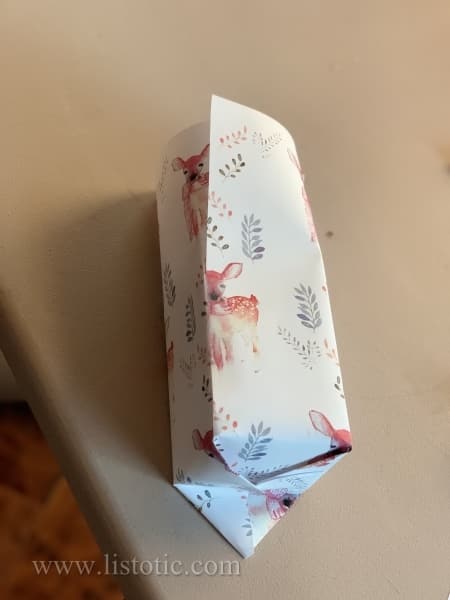
But let’s get back to what we were doing and WRAP this up. Since this was a small gift, a button seemed like the perfect topper.
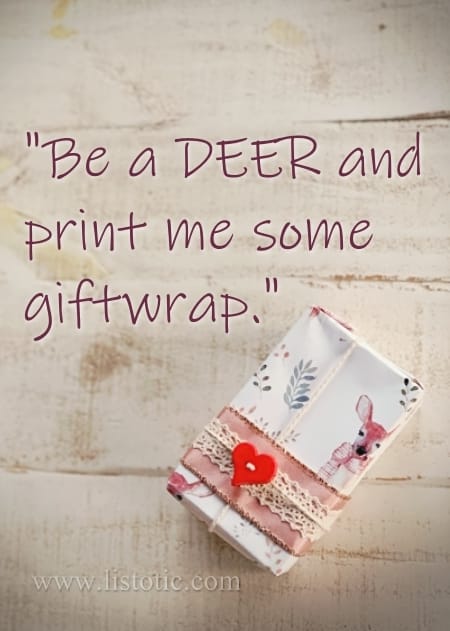
I used some girly pink ribbon and dainty twine around the gift. Finished it off by threading a heart-shaped button for my sweet “Deer” niece.
Andrea's Finished Package
7. Share some Christmas Cheer with Pom Poms.
Cammie's Inspiration
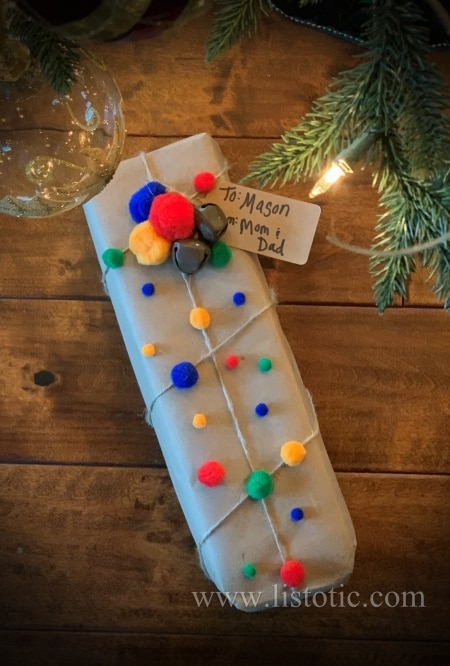
Little pom poms seem to be showing up in a lot of DIY crafts. I have them floating around my house is various nooks and crannies, so I decided to make pom pom wrapping paper.
My inspiration came from an image on Wal-mart.com. They used a marker to create a garland with poms as the light bulbs, but my affinity towards twine won out – especially with my lack of drawing skills.
Cammie's Wrapping Project
Materials Needed:
Hot Glue Gun
What can be better than twine and kraft paper? My intention to use the twine as garland went to the way-side. I just couldn’t help myself when I got a hold of the glue-gun and started attaching poms all over. I added jingle bells and some larger poms to give some added dimension and a little sound.
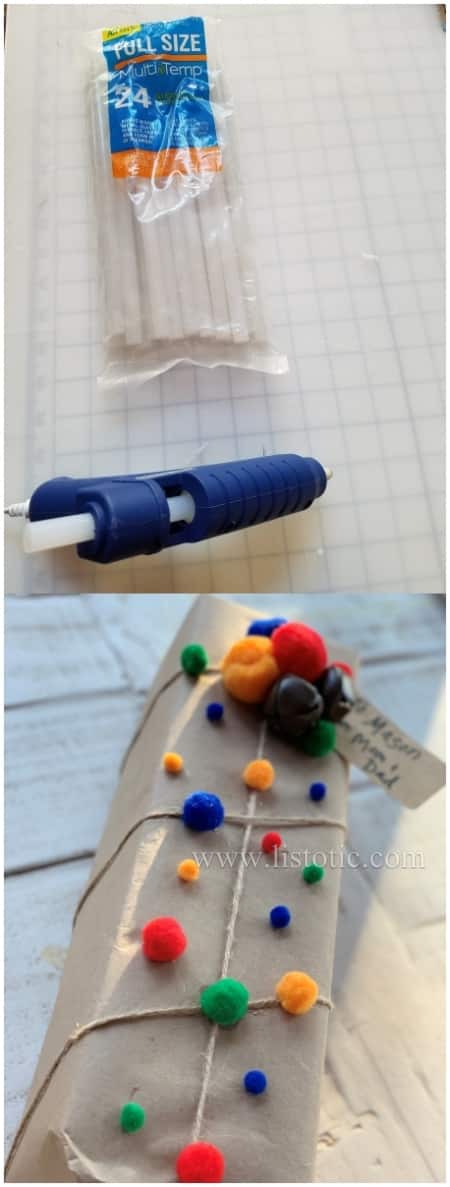
Cammie's Final Package
This is a gift for my 4-year-old grandson who will love the bright colors and the cool remote control snake inside! Hisssssssss…..
8. Big Poms for Garland or a Gift Topper.
Cammie's Inspiration
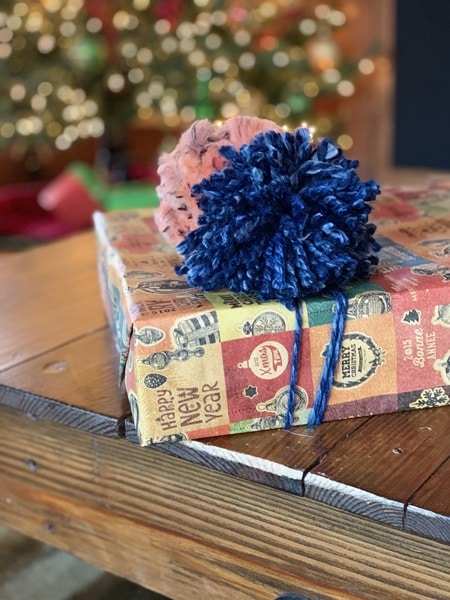
HGTV was the basis for my inspiration for big poms made of yarn. Check out the variety of colorful poms and an option using a doily and a smaller pom from HGTV.
Cammie's Wrapping Project
Materials Needed:
For larger pom you will need a 4″ wide board
Yarn
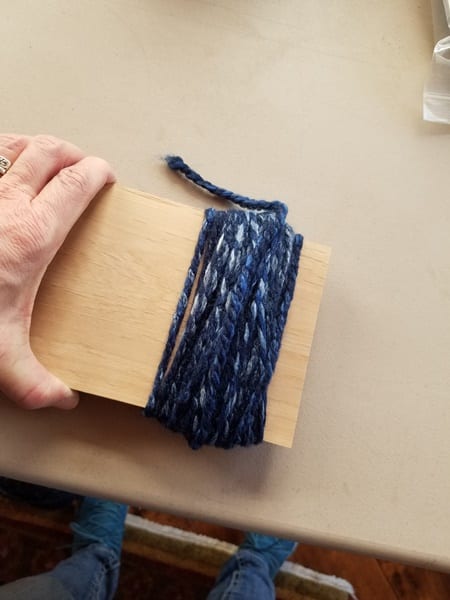
Making the yarn pom is a quick and easy way to add some pop to a present. Here are some step by step instructions.
Step 1: Wrap the yarn around a 4″ board. The amount of yarn you use will determine how full the pom will be, so make sure you wrap more than a couple of times.
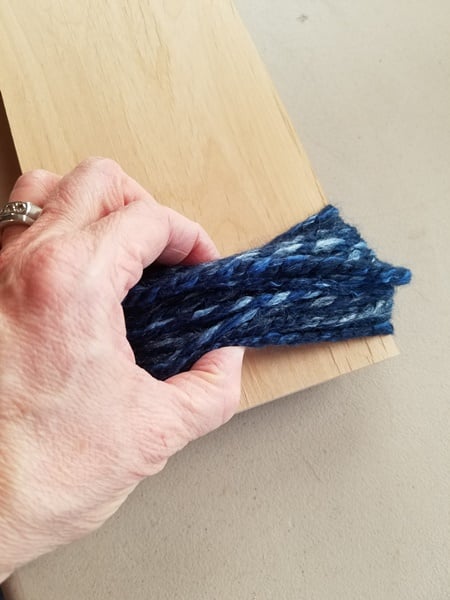
Step 2: Slide the yarn to the edge of the board, and pull it off. Try to use both hands as you pull it off, to retain the loop you created by wrapping it around the board.
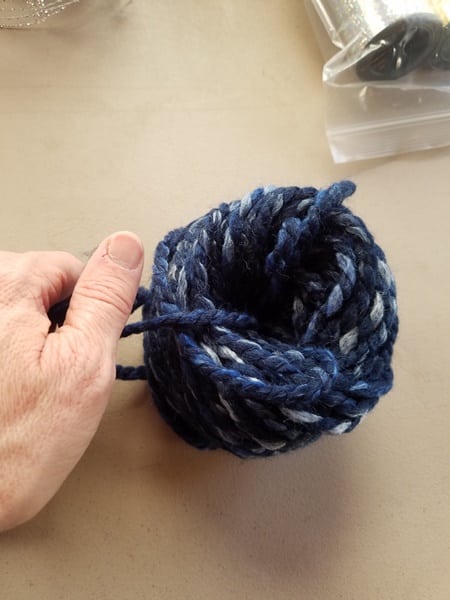
Step 3: (Some instructions skip this step, but I like to do this extra step to hold the yarn together so no loops slip out as I'm working with it.) Take a piece of yarn 10-12″ long, and wrap it around the middle of your loop to help hold it together. Tie a knot to hold it.
Step 4: Now, use the ends of the piece of yarn you just tied together, and split your big loop in half and create two new even loops. Make sure you have the ends tied tightly.
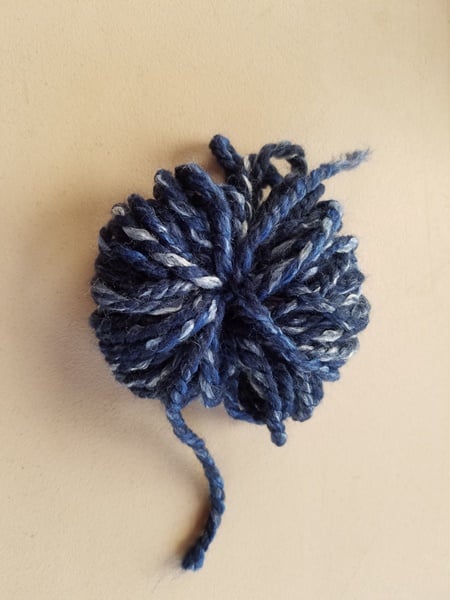
Step 5: Next, you can cut your loops to create the pom. I place the scissors in the group of loops and give it a little tug to make sure I am cutting the loop evenly. However, you may need to trim any uneven lengths of yarn to create a symmetrical pom.
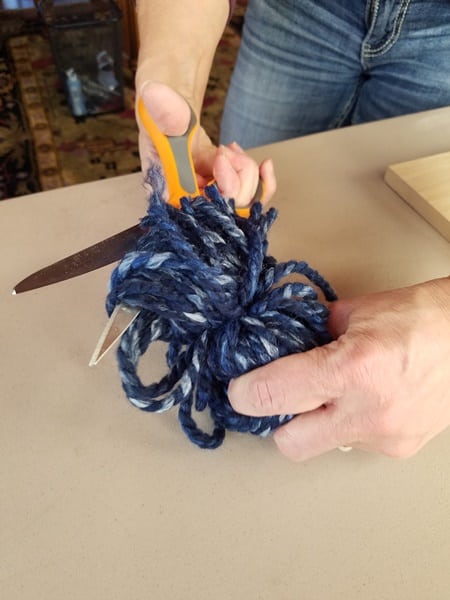
Step 6: Finally, wrap yarn a few times around the package and tie on the pom.
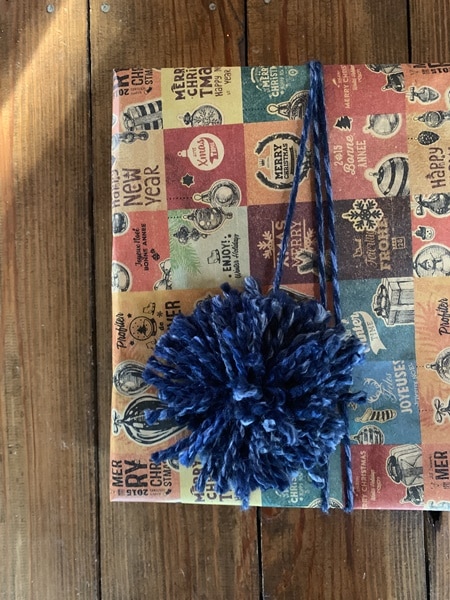
Cammie's Finished Package
Making the pom was so easy and fun, I made another one out of fluffy yarn to add some more color to the package. (Not that there wasn't enough color already.)
9. Let it snow, let it snow, let it snow! Create snowman wrapping paper.
Cammie's Inspiration
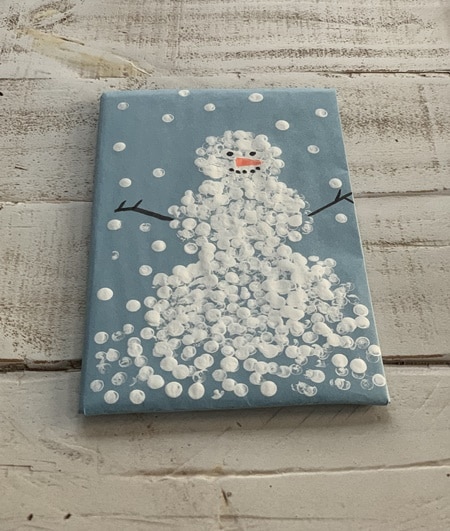
I love snowmen! They are my favorite decorations at Christmas. They are always so happy! So, I couldn’t resist trying out this snowman wrapping paper. The instructions I found at Artsy Craftsy Mom called for using sponges. I didn’t have circular sponges, so I used the eraser end of a pencil.
Cammie's Wrapping Project
Materials Needed:
Construction Paper
Paint
Black Sharpie
Pencil with eraser
TIP: Next time, I would draw out the snowman to get the dimensions right before I started. In my case, I had to keep making the snowman bigger to get him to fill up the page and look somewhat symmetrical. Just like the inspiration, I could have added a top hat and scarf, but I liked the simplicity of this snowman. And, notice, he is smiling!
Cammie's Final Package
10. Eco-friendly Scarf Gift Wrap
Cammie's Inspiration
As the weather turns colder, we pile on the coats, hats, mittens, gloves and scarves. What a great way to give a gift of a scarf, use it as wrapping paper for a pair of gloves! My inspiration came from Heathered Nest. They have a cool image of all of the steps to make this a sure hit for wrapping.
Cammie's Wrapping Project
Materials Needed:
Scarf or Flannel Fabric
Greenery
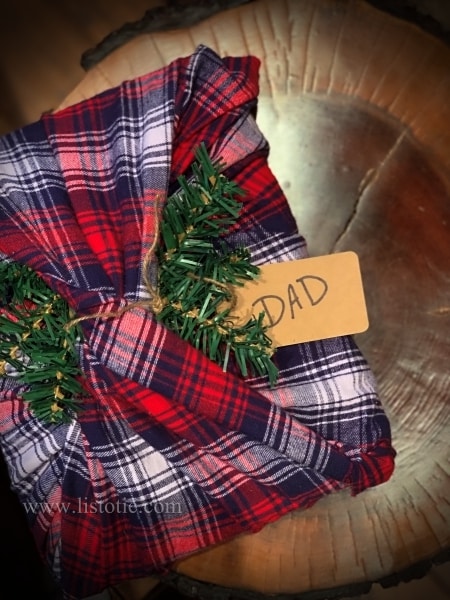
Since I didn't have a scarf, I made one. I found a plaid flannel piece of material at home and cut 4” strips on each end for the fringe, and used it to wrap the present. To wrap the present, place the package face down on the material, twist the material and wrap it around the backside of the package. Make sure the front has a twist knot and the back is flat (the bottom left picture shows the backside of the package). Next, with the package face up, bring the ends of the scarf around to the front and tuck the ends under the twist knot.
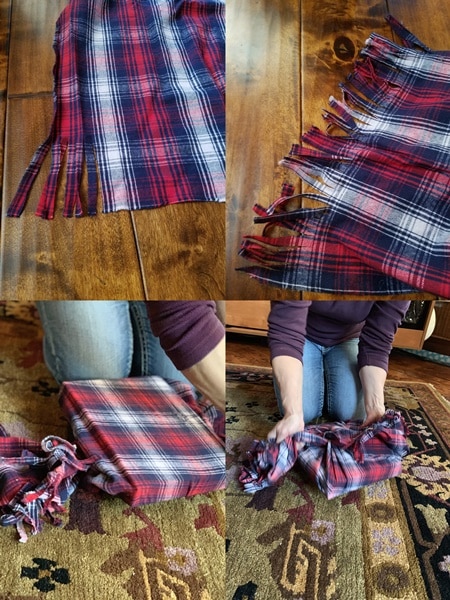
The biggest challenge is to make sure the entire present is covered with the scarf. In fact, I had to find a smaller box for the gloves. You will also have to tuck the scarf under the twist on the top of the box to make sure it is covered.
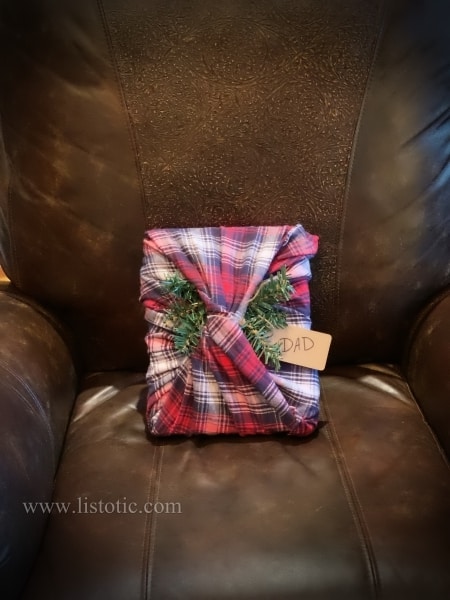
Cammie's Final Package
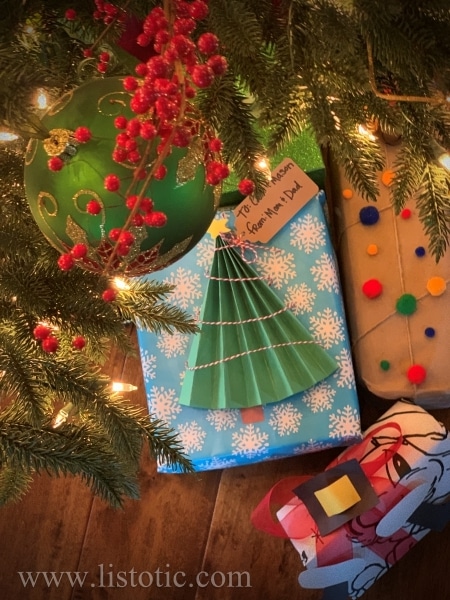
11. Accordion Christmas Tree
Katie's Inspiration
This accordion tree wrapping caught my eye. I found the inspiration at DIY n Crafts. The trimmings on their 3-D accordion tree are worth a peek! Unfortunately, I didn't have the supplies and had to improvise. But, I think the baker's string works, too.
Katie's Wrapping Project
Materials Needed:
Construction paper
This was one of my favorites to put together.
Start with a piece of construction paper, and fold it back and forth about 1/2″ wide. When putting this together, I found it best to use a hot glue gun to securely adhere the Christmas tree to the wrapping paper. Lastly, wrap the string of “lights” and top it off with a felt star!
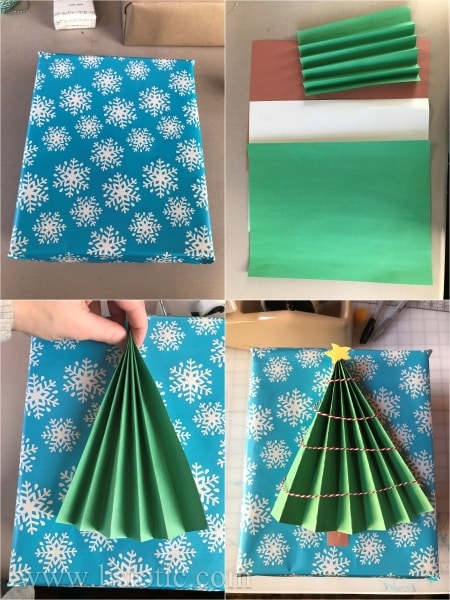
This looks like it took a lot of work, but it was really very easy!
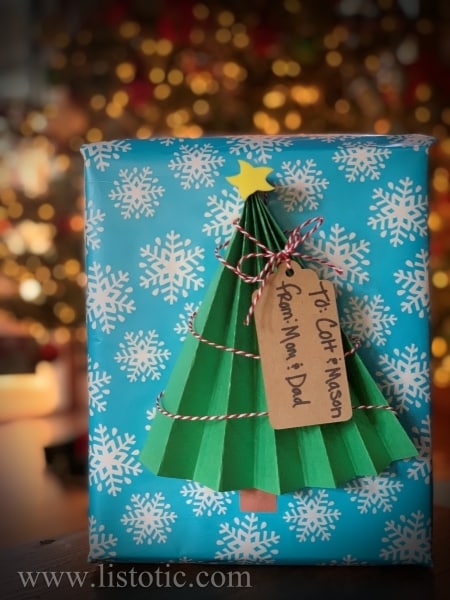
Katie's Final Package
I love the pop of color this one brought under the Christmas tree.
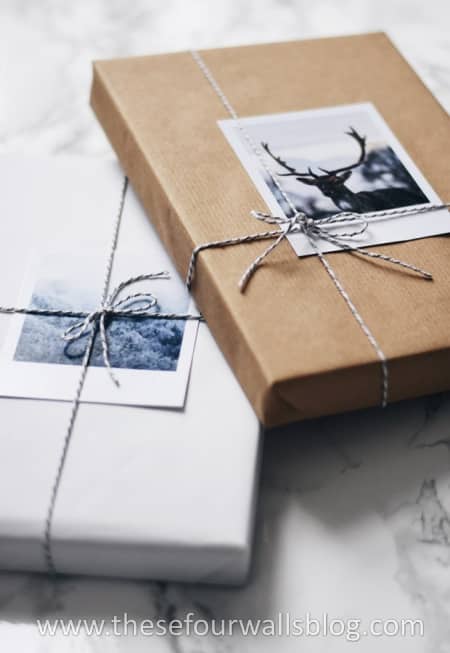
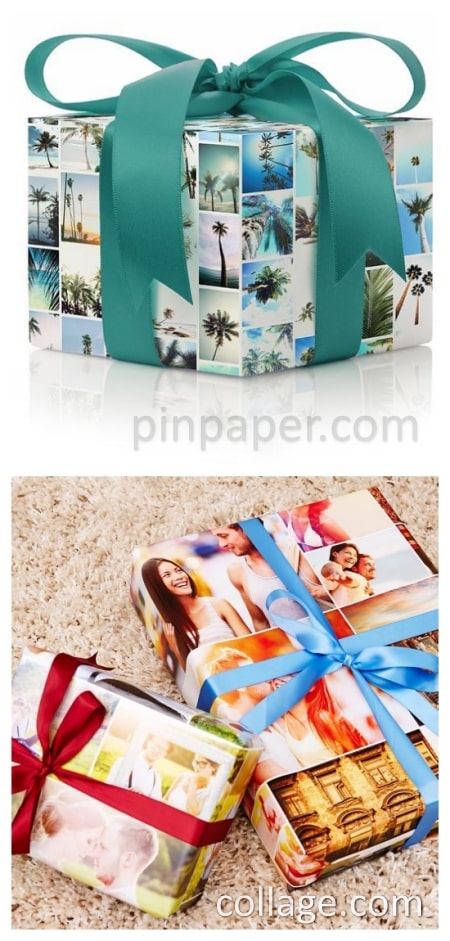
12. Personalized Photo Gift Wrapping
Andrea's Inspiration
I’m a picture person; so this gift wrap idea is right up my alley. I was drawn to the post at – These Four Walls. Here Abi used her beautiful Instagram photos to create a personal twist on her packages.
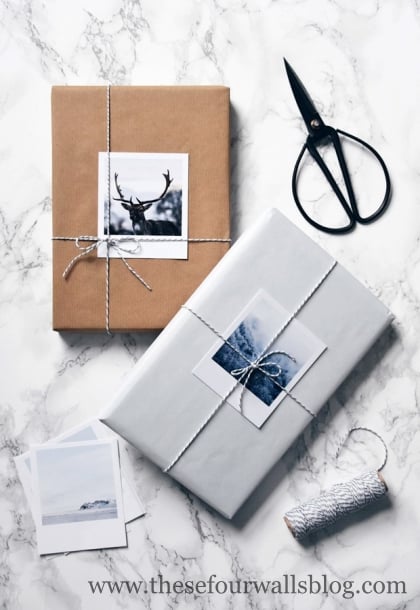
I think you could go two different ways here… you could either spend extra to make this photo gift topper part of the gift by purchasing a professional photo product; or you could inexpensively print on copy paper and simply make the package more attractive but not expect the receiver to necessarily keep the photo on top… although they might!
I haven’t had a chance to try this out yet, but I just know that my husband’s Grandma would adore an old photo of the local historical Stone Bridge where she raised her family as the gift wrap to her Christmas present.

This is “a photo of a photo” that was in an old scrapbook. I opened my favorite easy photo software PhotoScape to give this image even more of a vintage appearance by using different film layers and color adjustments.
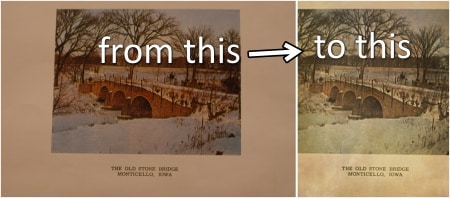
Make sure if you are going to take the time to edit and print images, you are gifting to someone who likes to take their time unwrapping their gift. You know they will appreciate the extra thoughtful touch!
Another fun photo wrapping paper idea involves printing your own rolls of wrapping paper out of photos. Here are some places you can special order from photo product sites like pinpaperpress.com, Zazzle.com and Collage.com
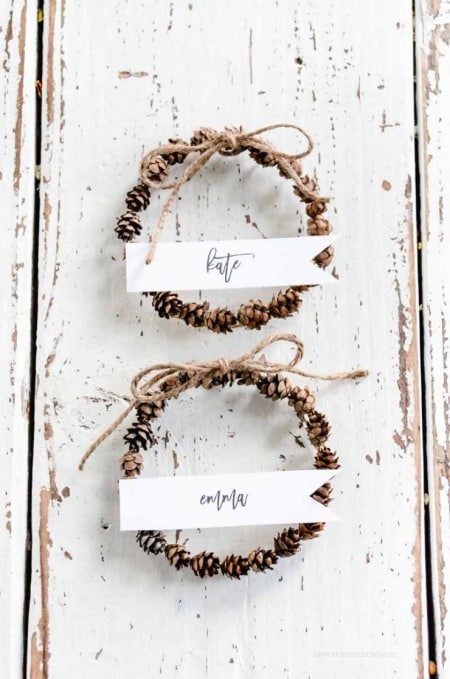
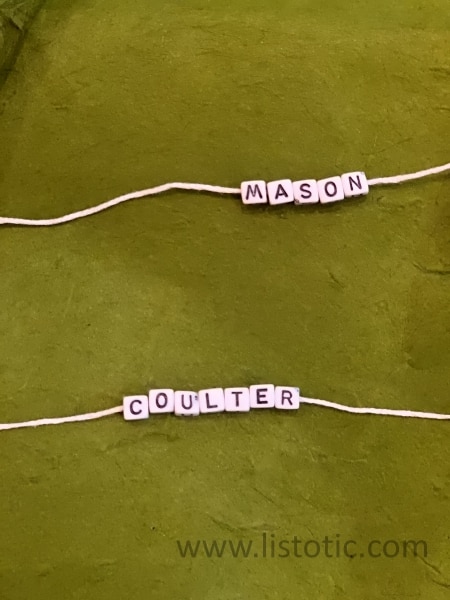
13. Creative Gift Tags – Personalized Letter Beads
Katie's Inspiration
Finally, the last creative way to wrap a gift. I love this idea of personalizing that special someone’s gift with a beaded string. It just gives an added touch of thoughtfulness and creativity. It gives a fun twist on a classic gift tag.


 Please refer to our